Seriously, How Are You Meant To Clean Morel Mushrooms?
Mushrooms are one of those infinitely varied foods, with tons of different mushroom varieties on offer wherever you go, from shiitakes to chanterelles and porcinis to portabellos. One of the most identifiable varieties is morels. Morel mushrooms are incredibly expensive, with a pound often running around $20 or more, but their flavor is worth it; there's nothing quite like the taste of fresh morels. There's plenty more you should know before eating morel mushrooms for the first time, but there's one big caveat that makes them trickier to deal with than many other mushroom varieties: You must clean them thoroughly.
With most mushrooms, cleaning is simple: You just brush them clear of dirt, and you're good to go. Granted, there is a healthy debate about whether you need to wash them (and there is an ideal way to wash mushrooms before cooking them), but it's not usually necessary. The process for cleaning morels, though, is more complicated owing to their tendency to trap dirt far more than many of their fungal cousins. Generally, you're looking at a three-step process: shaking, rinsing, and drying.
Morels have a tendency to trap a lot of debris

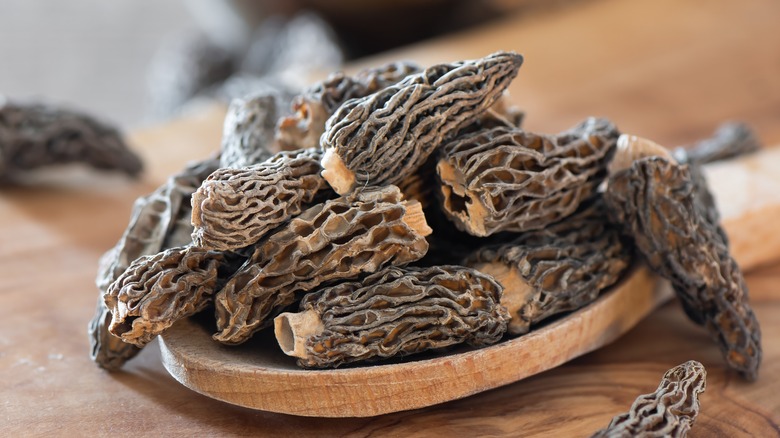
You will never confuse morels for anything else because, visually, they are striking. Their conical shape is recognizable, but even more so are the wrinkly, almost brain-like caps that give them their distinct texture. But those wrinkles don't merely affect the eating experience, as they also foster lots of little nooks and crannies that trap dirt, grit, and even tiny bugs – things you definitely don't want to be eating. That is why cleaning morels is more involved than cleaning, for instance, white button mushrooms.
The first step is shaking. It won't get all the dirt out, but it'll deal with many of the bigger chunks stuck in there. Put the morels in a colander or paper bag and firmly shake — but don't go too hard, as slamming the mushrooms around might damage them. Then lift the morels out of the container individually, as pouring them out will drop all that dirt and grit right back on top of them, undoing everything you've just done.
Rinsing and drying are equally important

The second step is rinsing, and there are a couple of schools of thought here. One theory involves putting the morels in a large bowl of cool salt water and gently circulating them to release more dirt. The second method is similar but involves extra steps: Rinse the morels under cold water, then cut them in half and execute the same process as the first method. In either case, keep going until you don't see any more dirt coming off them. If the water gets overly dirty, you may need to replace it with fresh water and keep going. You don't want to soak them too long, or they'll become soggy; generally, it'll take you less than five minutes.
The third and final step is drying the morels. Once you've taken them out of their saltwater bath (again lifting them out of the water rather than pouring it out), set them on either a kitchen towel or paper towels. Then gently pat them dry repeatedly, not stopping until you're sure you've got all the water. It's also a good idea to shake them as you do this, as it helps spring the water free.
At the end of this process, you should have fully clean morels, perfect for spring pea potstickers with morel mushrooms or crepes with chicken and morels. The work may seem a lot, but in the end, it's worth it.