Design Your Own Checkerboard Cake With The Help Of Ring Cutters
When it comes to decorating cakes, most people just focus on the exterior. Which often means playing around with colorful frosting and toppings to give their dessert a visually stunning look. However, rather than just spending all your time and attention on what it looks like on the outside, why not play around with how the confection looks on the inside?
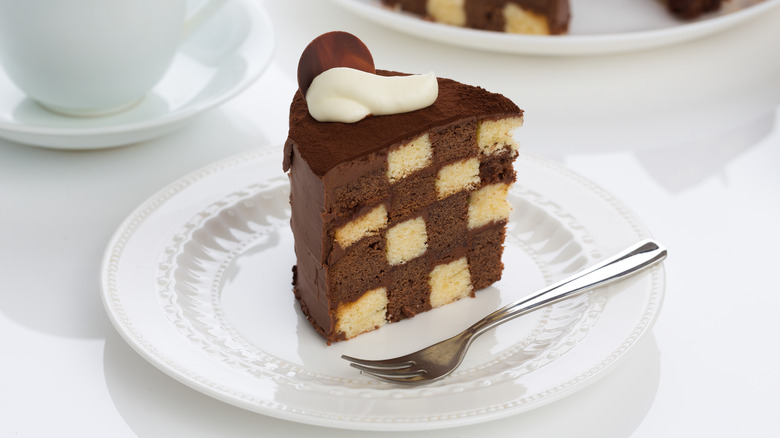
One easy way to do this is to turn your cake's interior into a checkerboard, with alternating squares of colors when you slice into it. Thankfully, this trick is also relatively easy to make, just requiring a set of ring cutters and your usual bakeware. Of course, while this method isn't overly complicated, there are a couple of steps involved to know about. Plus, you'll want to think about a couple of ways to stack, decorate, and serve it to create a true showpiece for your family or guests.
Bake and cut your cakes

To get started making this checkerboard treat, you'll want to first bake your cakes. You're actually going to make multiple-round versions. Remember, the number that you bake will be the number of layers tall your dessert is. For instance, for a taller confection, you could do four cakes, or for a shorter version, just two might do the trick.
Regardless of how many you bake, to get the checkerboard effect you'll need to choose two different colors. For example, you could make a chocolate and white cake. Another option would be to go with two basic vanilla varieties but add food coloring to create beautiful colors. You could also play around with red or blue velvet recipes for fun, bright designs.
Whichever route you go, you'll then bake the desserts and allow them to cool. Once they've cooled down, use decreasing sizes of cutters to divide your cakes into rings. Then, piece the confections back together by spreading the frosting around the inside of each ring. Next, alternate the different cake hoops, gluing them to the inside of the one larger than them to make a completed circular layer. The result is two complete layers that look something like two targets. Each layer should alternate opposite colors.
Stack and serve your checkerboard dessert

Once you've pieced together your cakes, it's time to start stacking. You can use a bit of frosting to glue your dessert to your cake stand to help keep it in place as you work. Then, spread a dollop of frosting on top of the first layer. You can use whichever frosting strikes your fancy and will pair well with your confection's flavors, be that a traditional American buttercream, a cream cheese frosting, or something else.
Now, for your next layer, choose a cake that has a different color outer ring from the base layer. Stack this on top of the first one, spread more frosting over, and repeat the process, making sure to alternate the color of the outer rings of each cake layer as you go.
When your baked goods are stacked, cover the whole cake in frosting and smooth it out. You can then get creative and add decorations. To go with the checkerboard theme, for instance, you could add chess pieces atop the cake. Or, you can add more timeless decorations such as sprinkles, chopped nuts, or chocolate. When the dessert is ready to go, cut it into slices and get ready to wow your guests.