The Squeeze Bottle Tip You Need To Effortlessly Drizzle Chocolate
Dessert decorating is an art that can be challenging to master. Edible ingredients are often uncooperative when you're trying to shape them into something beautiful or intricate. Even the best designs can emerge unsightly. Melted chocolate, in particular, is a temperamental confectionery. It can easily scorch as you melt it or seize (turn from smooth to grainy and gooey). Even if you melt it properly, it can get everywhere as you try to decorate.
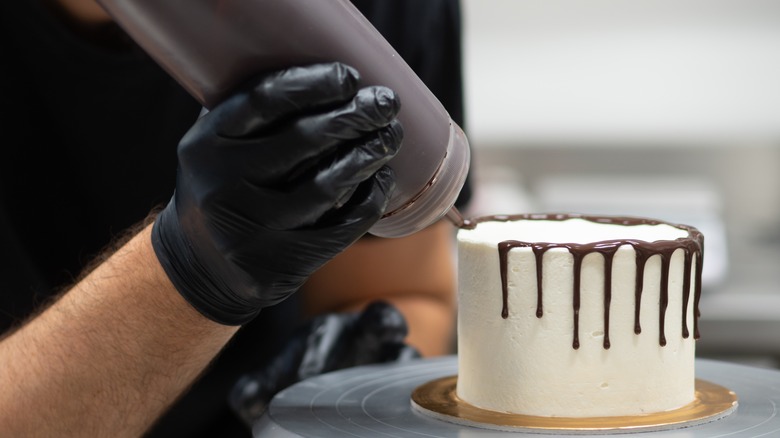
Dripping with spoons or forks is imprecise and unhelpful if you're trying to draw, write, or drizzle. If you're an experienced dessert decorator, you've likely tried to perfect these techniques by cutting the end off of a plastic storage bag to create a makeshift piping bag for melted chocolate. That can be hard to control, prone to dripping, and messy to clean up, though. Enter the squeeze bottle. This veteran of condiments contains your melted chocolate, allows for directed decorating, and is easy to keep warm as you go.
Just snip the tip off the bottle top to create sweet drawings and designs or to write chocolate words. It's also a quick and clean way to create a drizzle over the edges of cakes and cookies or to fill chocolate molds. When you're finished, just wash it out and put it away for next time.
Make (and keep) the perfect melt

Before it fills the squeeze bottle, though, chocolate has to reach the right consistency, a task that isn't always easy. Typically, it's best to start with melting or baking chocolates instead of chocolate chips. Although chocolate chips are useful they contain soy lecithin. Soy lecithin helps retain the chips' shape but can also make them melt less smoothly.
The microwave method for melting chocolate is simple but it isn't quite as hands-off as you might think. Throwing the chocolate into a bowl and turning the timer on for a few minutes is a surefire way to scorch your chocolate. Instead, melt your chocolate in intervals of about 30 seconds, stirring as you go. Water can cause the chocolate to seize, so make sure that your utensils and bowls are fully dry before you use them. The same applies if you melt the chocolate on the stovetop or in a double boiler. The stovetop method is quick and easy but you'll need to watch the chocolate closely and stir constantly to avoid burning. A double boiler will take a little longer but you won't have to worry about scorching.
Once you've spooned or spatulaed that melted chocolate into your squeeze bottle, you can start drizzling. Don't feel rushed to finish before the chocolate hardens, though. You can keep the bottle warm with a heating pad or warm water bath (just don't let any of the moisture into your chocolate).
Don't toss the squeeze bottle

That squeeze bottle is perfect for drizzling melted chocolate but it will quickly become a kitchen staple once you test out all of its culinary applications. A squeeze bottle can replace almost anything normally accomplished with a piping bag and will be easier to clean and reuse. Reach for the squeeze bottle for effortless cookie decorating. Your icing designs will be more precise and the icing less likely to dribble out than with a piping bag. Squeeze bottles are ideal for sophisticated decorating or if you're letting the little ones try their hands at cookie creation.
You can also say goodbye to dripping spoons or overflowing mixing bowls when it comes to your morning pancakes. A squeeze bottle makes pouring pancakes mess-free. Just a few squeezes will let you manage the shape and regulate the size of your pancakes more effectively than when relying on a pour. The squeeze bottle will soon be in your regular kitchen tool rotation.