How To Save Melted White Chocolate If It Burns
Some of the best dessert recipes out there call for chocolate. Think chocolate-dipped strawberries, decadent chocolate cake drizzled with chocolate ganache, or tasty cake pops for your next party. The trouble is, when it comes to melting down chocolate, and especially white chocolate, for baking, it's all too easy for you to burn your chocolate. Rather than getting smooth, melted chocolate perfect for dipping, you're stuck with a sludgy, lumpy, grainy mess.
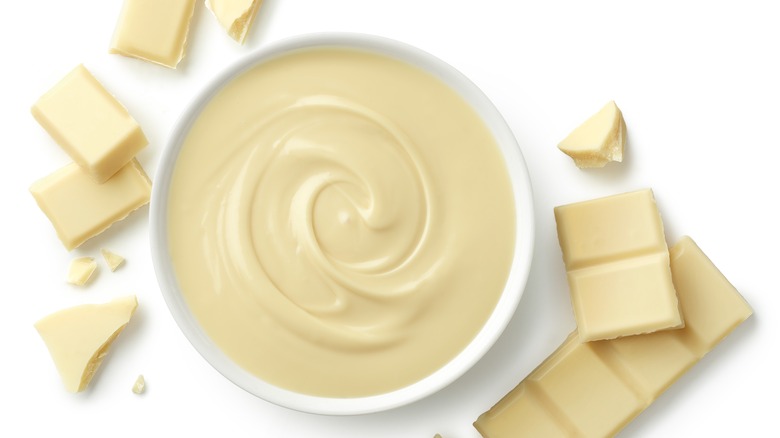
When chocolate turns grainy and lumpy, it's seized. Seized chocolate means that you've overcooked your chocolate and it's burned, or it can also mean that you've allowed moisture to get into it while you were melting. Either way, the result is a lumpy mess that won't work for dipping or desserts. The good news is that while it's true working with white chocolate can be a bit tricky, there are actually a few things you can do to save it if it burns. Here's how to save your white chocolate if it burns or seizes while you're melting it.
White chocolate versus milk chocolate

Before we dive into talking about how to save white chocolate if you burn it, let's take a second to explain the differences between white chocolate and milk chocolate. Although they might both be called chocolate, they're actually pretty different, which means that melting them looks different, too.
Milk chocolate is made up of milk, sugar, cocoa powder, and cocoa butter. On the other hand, white chocolate contains sugar, cocoa butter, and milk and doesn't contain any cocoa solids. Since milk chocolate contains no cocoa solids, it has a lower melting point. This lower melting point means that it's easier for you to overheat white chocolate, making it much harder to get to a smooth, creamy consistency. If you overheat it, your white chocolate will turn lumpy and grainy rather than melting into a smooth liquid.
One similarity between white and milk chocolate, however, is that both will seize if they come into contact with water during the melting process. To avoid this, make sure that your utensils and hands are dry as you work with the chocolate; otherwise, you could wind up with a mess rather than a perfectly dippable dessert.
Cool down the chocolate

If your white chocolate has seized up, the first thing you want to do is remove it from the heat. Removing the chocolate from the heat allows it to cool down, and the quicker you cool it down, the quicker you can get it back to its original consistency.
Remember, the sooner you get the chocolate off the heat, the better. As soon as you notice that your white chocolate is starting to clump up, get it off the burner and start trying to reduce its temperature. To avoid the chocolate cooking even more as it cools down, transfer it to a cold or room-temperature bowl. This will help speed up the cooling process and will prevent you from unintentionally allowing your chocolate to keep burning. You can also try setting the bowl in front of a fan to help accomplish the same goal and get your chocolate to cool down faster.
At this phase of the process, you can also place the bowl of white hot chocolate into an ice bath. Just remember to be extra careful as you do so. If any splashes of water get into your melted chocolate, it can seize again, making it even harder for you to save the confection.
Add more whole pieces

Besides just taking the white chocolate off the heat, you'll also want to add a few more squares of white chocolate to the mixture. Along with removing it from the heat, adding extra pieces will help cool the temperature down. Aim to add even squares or chunks of white chocolate to try and account for an even melt. Stir the mixture to evenly distribute the heat and to help incorporate the newly introduced chocolate melt into the overcooked mixture.
Remove the lumps

After stirring in more chunks of white chocolate, you may find that your mixture still has some lumps in it. If this is the case, you might be able to get these out of your melted mixture by using a sieve to strain your chocolate. You can use the back of a spoon to gently massage the white chocolate as you pour it through the sieve, helping to break up clumps and get the chocolate back to a liquid state.
If the sieve doesn't work, you can always try blending your chocolate. The blender can help break up the lumps and clumps in your chocolate and get it back to a liquid consistency. Just remember that before you blend your white chocolate, the mixture needs to be cool. You should also already have added the additional pieces of solid white chocolate to the mixture. Additionally, consider carefully what type of blender you'll use. An immersion blender or even a frother wand can result in less yield loss than pouring your mix into a countertop blender.
Add some more oil to your chocolate

If the above steps still haven't got your white chocolate back to its proper consistency, you can try adding additional fat to your chocolate. Although this sounds counterintuitive, adding a bit of extra oil to your white chocolate can help re-emulsify the mixture.
You don't just have to use oil, either. You can use butter, coconut oil, or another kind of fat to get your white chocolate back to itself. Just remember to add the fat bit by bit and stir the white chocolate fully after each addition. That way, you don't go overboard.
At the same time, it pays to know that you should only be using warm or room-temperature fat. If the fats are too hot or too cold, they may not be effective or could even make the mixture lumpier than ever. You'll also need to know that adding oil to your melted white chocolate can make it tricky to use if you're planning to coat fruit, cookies, or candy in it. It's best to use the emulsified mixture for icing or in other similar recipes.
If all else fails, caramelize your chocolate

If none of the above steps work for rescuing your white chocolate, you can always caramelize it instead. To caramelize your white chocolate, you'll need to heat your oven to 250 degrees Fahrenheit and spread the burnt chocolate out on a baking sheet. Then, just cook the chocolate for 10-minute intervals and spread the chocolate out with a spatula in between sessions.
Once the chocolate becomes a honey color, it's become caramelized. You can top it with sea salt if you like, or you can just break it into chunks and eat it plain. Just remember that when caramelizing your white chocolate, use real white chocolate with a high-fat content to ensure you get smooth, golden-colored white chocolate. So, whether you manage to save your burnt white chocolate during the cooking process or you wind up turning it into caramelized chocolate, just know that all hope is not lost! If you ever cook your white chocolate for a bit too long, there are still a few things you can do to save the day.