12 Tips For Making German Chocolate Cake Like A Pro
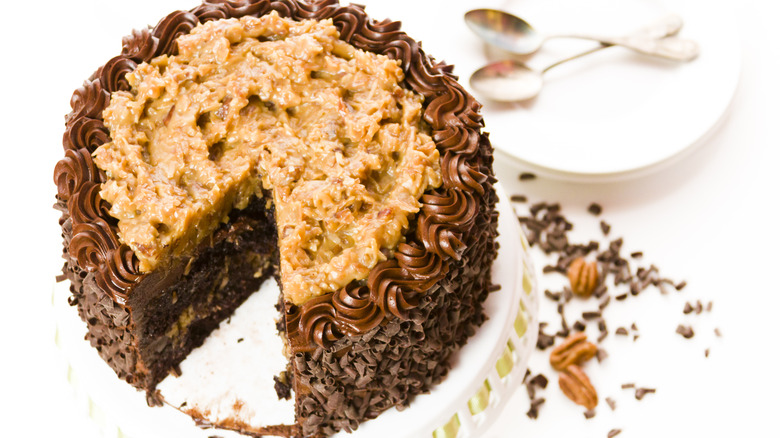
German chocolate cake is definitely not German in origin, but that doesn't take away from the fact that it's a glorious cake. The dessert is technically named after Samuel German, who created a baking chocolate product named German's sweet chocolate in 1852. Years later, in 1957, a baker used that chocolate to develop a heavenly cake with nutty frosting. People still make the sweet treat to this day because of its indulgent nature — it's a tender, sweet chocolate cake that supports layers of thick custard icing, full of coconut and pecan bits. The frosting has notes of caramel and vanilla, too.
In order to make the best cake possible, there are some pointers that you can follow along the way. To start, make sure you use an actual German chocolate cake recipe rather than something like, say, a devil's food cake. Not every chocolate cake is the same. They vary in baking methods and the type of chocolate you use. Whether this is your first time making it or you just want some extra advice for next time, these pro tips ensure your dessert has all the recognizable features of a genuine German chocolate cake (and a delicious one at that).
1. Use Baker's German's sweet chocolate

If you aim to make an authentic cake, then German's sweet chocolate is the way to go. The brand makes this chocolate with simple ingredients: sugar, chocolate, cocoa butter, and soy lecithin. Bakers like to use it because it has a sweet, creamy taste and melts perfectly silky. Typically, recipes for German chocolate cake only call for about four ounces, which is exactly the weight of one baking bar, so it works out conveniently. You can find the chocolate at your local grocery store or bigger chains like Walmart. It's also available for purchase online.
If you can't get your hands on the product for whatever reason, just try to find a similar chocolate product to use in its place. Otherwise, if you buy a bar with a higher amount of cacao, it has a more bitter flavor to it. Technically, dark chocolate usually has over 50% cacao; German's chocolate contains 48% cacao, so it's right on the edge between milk and dark. You can also compare the sugar amounts to find something nearly identical. That way, when you use replacement chocolate, it doesn't drastically alter the taste of the cake.
2. Utilize cake flour

When you make this type of cake, it turns out best when you use cake flour — go figure, right? Cake flour has a different composition than AP flour or other flour on the market. Regarding protein content, it might have around 50% less than AP flour, depending on the brand. Why does protein matter in cake recipes, exactly? Flour with higher protein makes the cake's crumb more compact, meaning it's denser. So, since cake flour has smaller amounts of protein, it produces airy baked goods. Companies rigorously process cake flour, which they make with soft wheat, to give it a light consistency. This helps with recipes like this one, where you fold the meringue into the batter because you don't want the flour to weigh down the fluffy egg whites and deflate all of the air out of them.
Furthermore, since the flour granules are so fine, it effortlessly blends with liquids. However, that doesn't mean you should skip out on sifting it. Take that extra step to run it through a sieve, even if the bag says it's pre-sifted, because it might clump during storage and transportation. Lastly, find a recipe that requires cake flour to begin with for the best results possible because if you try to substitute it in a recipe that asks for AP flour, it doesn't work out as well since they are so different.
3. Melt the chocolate correctly

Many recipes require you to melt the baker's chocolate with some water on the stovetop. While that does work if you are super careful, it is better to melt the chocolate using a double boiler as a precautionary measure. The direct heat from the burner to the pan is too risky, while the double boiler becomes hot from steam instead, which is a gentler heating method. Otherwise, the chocolate might seize up and take on a burnt flavor. You only need a metal bowl that fits over your pot to set up a double boiler. Fill the pot up about a third of the way with water and then put the bowl over the top, ensuring the water doesn't directly touch the bowl.
Once the water is hot and steaming, the measured water in the bowl melts with the chocolate, emulsifying it into a smooth, velvety mixture. If your recipe uses cocoa powder too, bloom the cocoa in the hot water. You might not realize that hot water is all you need to boost the richness of the chocolate cake, but it's the secret trick to bringing out the best qualities in cocoa powder. It also becomes a chocolatey paste that is much easier to incorporate into the recipe than dry powder.
4. Add coffee to the batter

Aside from blooming the cocoa powder, if you want to go the extra mile to make the cake rich, the key is to add some type of coffee to your batter. Coffee enhances the flavor of chocolate and other sweets, which is why it's the secret to making fantastic chocolate cake. So, it's not necessarily that your cake tastes like coffee. The chocolate flavor becomes more intense and more decadent instead. The easiest way is to simply use hot brewed coffee instead of water when you melt the chocolate chunks. Use plain black coffee and substitute it at a one-to-one ratio in the recipe.
Although it takes some time and effort to brew it, its impact is undeniable when you bite into the finished cake. However, if you don't want to make coffee, you can always put 1 teaspoon or so of baking espresso powder in with the dry ingredients. You can sift it right in with the flour and leavening agents. Since you only need a small amount, it doesn't affect the cake batter's consistency or make it super thick. And, since espresso powder is also dark in color, it blends right in with the chocolate cake, too, which is always a bonus.
5. Beat the egg whites to stiff peaks

This type of recipe typically has you whip the egg whites because it makes the cake pillowy once it bakes. However, for the whites to do their job, you must mix them to the right consistency. Ideally, they become a smooth, light mixture that forms a peak shape when you lift a portion out of the bowl. Additionally, if you run a spoon through it, the mixture holds its shape. However, if you under whip them, they're soupy and don't have as much air as they should. Therefore, the crumb of the cake turns out denser compared to fluffy.
On the other hand, if you over-mix the egg whites, it causes other issues. Essentially, the mixture turns grainy and breaks down, so there's liquid on the bottom of the bowl. That's certainly not ideal to put into your cake batter. But don't worry, there's an easy way to fix over-whipped egg whites. All you need do is separately mix a single white with a whisk until it thickens. Then add it to your other egg white mixture and use your mixer to blend them, which rescues the initial batch.
6. Fold the batter by hand

You can always use a handheld or countertop mixer for the first part when you cream the butter and sugar (which whips air into it). Even more so, making stiff peaks with egg whites is difficult by hand, so you can surely use a mixer for that too. But since you have to incorporate egg whites into the batter later on, it's crucial that you fold it by hand during the final stages because it's a delicate process. When it comes time to finish the batter, mix a couple of scoops of the fluffy egg whites into it, which lightens up the consistency, making mixing in the rest easier. Then add the remaining whites in two or three separate additions to blend it in gradually.
Use a rubber spatula, preferably, and make sweeping motions from the bottom of the bowl onto the side and over the top to gently combine the chocolatey mix and egg whites. If you mix it too roughly or for too long, you might deflate all the air, making the cake's texture tough when it bakes. Once you add your final addition, it is okay to have tiny streaks of egg whites that aren't entirely blended in. They don't harm anything. Carefully transfer the batter to your pans to keep the air in the batter.
7. Use egg yolks in the frosting

The original recipe for German chocolate cake contains egg yolks in the icing because they act as a thickener. When you heat the yolks, the proteins inside them uncoil, and a chemical reaction — gelation — occurs. In simple terms, the hot temperatures help the eggs to solidify the mixture you have them in, which is why people use them to thicken savory sauces too. Aside from their textural benefits, they also provide the topping with a rich flavor and golden color.
So, even though you don't need many yolks for the icing, they still significantly affect how it turns out. Therefore, if you don't use them, the frosting is extremely runny and doesn't have the same quality as the standard coconut pecan frosting. If you have an egg allergy and can't make the authentic version, replace the yolks with a different type of thickener so the frosting can become spreadable.
8. Choose your coconut carefully

Since coconut makes the frosting in German chocolate cake so unique, the type of coconut you choose plays a big role in the overall taste and texture of the dessert. For instance, you can select either flaked or shredded coconut. Flaked coconut comes in thicker pieces, giving the frosting a crisp texture between the creamy, custardy goodness. Meanwhile, shredded coconut comes in much thinner strands than the flaked version, so it's stringier. There isn't necessarily a right or wrong option, but really, it's all up to what your preferences are. Aside from the shape of the coconut products, there are also sweetened and unsweetened kinds.
The benefit of sweetened coconut is that it's typically less dry, so it has a better overall mouthfeel. However, you don't necessarily notice that the unsweetened kind lacks moisture since it's mixed in with all other frosting components. Of course, the significant difference is that the sweetened one is sugary. Some people think it's overkill for an indulgent cake like this and that the unsweetened kind is better because it helps balance all of the flavors in the cake.
9. Make the frosting on the stovetop

Carefully follow the directions when it comes time to make your sweet, nutty frosting. First, don't cook it on high heat; medium is sufficient. Otherwise, you risk burning the mixture because it has fragile ingredients, such as the evaporated milk and eggs. In addition, it's not wise to leave the pot unattended because this type of icing requires you to stir it constantly, which ensures it heats evenly and the bottom of the sauce doesn't stick to the pan.
After a while of cooking, the icing foams up, which is a sign that you are on the right track. Allow it to turn into a gorgeous caramel color before you add the nuts, vanilla, or coconut. Since it has eggs, the U.S. Department of Agriculture notes that it's a good idea for safety reasons to use a kitchen thermometer to guarantee it reaches the right temperature, which is 160 degrees Fahrenheit.
10. Toast and chop the pecans

Using pecans straight out of the bag is safe, but when you toast them, it gives them a more pronounced flavor that makes the frosting shine. Additionally, they turn a darker brown color when you do so. It's super easy to toast them because you only need a toaster oven, conventional oven, or air fryer. They only take about 5 minutes in the air fryer, while a standard oven can take up to 10 minutes. Whichever way you do it, make sure that you check the nuts halfway through the cooking time to stir them. They might start to brown only on one side, so if you flip them, it makes them toast evenly.
Furthermore, give them a rough chop before you incorporate them into the icing. This step prevents them from being too chunky in the frosting and weighing it down, especially if you plan to frost the sides of the cake and not just in between the layers. If you own a food processor, you can surely take advantage of it to break the nuts into smaller pieces in a matter of moments. Otherwise, a handy chef's knife does the job perfectly. It's a good idea to set aside some so you can use them later when you decorate the face of the cake.
11. Level your cake layers

Before you build your cake, make sure each layer is level. Otherwise, its appearance isn't as nice, and it looks droopy. To avoid your cake baking super domed in the oven, you can use cake strips. If you're unfamiliar with how to use them, they're quite easy. First, you have to make them damp with water. Then, carefully surround the circumference of the bakeware with them, which makes the baked goods cook more evenly because the moisture prevents the outer edges from becoming too hot too quickly.
However, it's not the end of the world if you don't have any cake strips to utilize. You can bake your cakes normally and then simply use a tool to shave off the excess. Use a serrated knife and score the cake where you plan to cut it so that you have a guide to follow. Then, slightly press the top of the cake down with one hand while you go around and cut the cake with a sawing motion, making the top flat. If you aren't quite comfortable using a knife, there are other ways. For instance, cake leveler tools with a wire can give you the same result.
12. Wait until the frosting and cake cool before assembling

Waiting until all the components cool before you assemble your cake is a key step in the baking process — although, it's undoubtedly hard to keep patient when it's coming along great, and you want to see the final product. However, it's important that you remain strong. If you try to build the cake while the frosting is still hot, it doesn't remain intact when you spread it, so it slides off. Even worse, if you put it on the sides of the cake, it all droops down into a pool on the bottom. Moreover, allowing the icing to rest gives it time to thicken to the proper consistency.
In regard to the cakes, they are extremely breakable when still warm. They don't have the structure they need to hold the frosting's weight, so it causes the cake to cave in on itself. As you can imagine, both instances are a disaster. If you are in a hurry, you can always transfer the components to the refrigerator to speed up the cooling process. Or, you can make the components a day in advance so they are ready for use the next day when you need them. Finally, when you build the dessert, ensure you have enough frosting for each layer. So if you have three cake layers, split the frosting into thirds beforehand so you don't run out before the last layer.